This is a brief overview of how to raise Monarchs. Please see our free detailed course full of photos and videos which explains how to raise monarchs with more depth.
Raising Monarchs is an educational, fun, life changing, and beautiful bonding experience with nature that you can get the whole family and friends involved in! To preface: Raising Monarchs is more of an educational experience rather than a way to drastically help. When we interfere with nature, we can cause more problems if we are not careful. Monarchs are adapted to their environment and have developed defenses to things that they will only experience in nature. Therefore, if you do choose to raise Monarchs, it is best if you raise them outdoors. It is a great median between acclimating the Monarchs to the outdoor environment and where you can watch and learn as well. Please make sure you're also planting milkweed meanwhile raising your Monarchs, as there aren't enough people who are planting milkweed, which is truly the best way to help save monarchs! Without milkweed, there's no Monarchs!
Raising Monarchs
Before you begin raising monarchs, you will first need to find some eggs! It is recommended that you don't purchase eggs online and find eggs from the wild, as a new study called the "Contemporary Loss of Migration in Monarchs" showed that captive bred monarchs didn't migrate.The eggs laid by captive bred monarchs, however, "showed no directional preference." This is why we recommend finding your monarch eggs from the wild, as there's a guarantee that they will migrate. Also, it's since caterpillars have already hatched and grown, and been eating for a while, there's a higher risk of it already having a virus or infection. When the Monarch is in egg form, theres a lower chance if it already being infected, so we recommend, for the health of your Monarch and its other Monarch friends, not to take home a caterpillar and leave it where it has been living and where it's used to
The same study showed that some monarch that were reared indoors lacked migratory behavior. They didn't' migrate. Lots of other rearing tutorials online are outdated, and so we can no longer follow them, as they all show you how to rear Monarchs indoors, which can affect their migration. Monarchs need specific environmental cues that they can only get from outdoors. Raising them indoors prevents them from getting these cues, thus not helping them to become migratory butterflies. The last thing we want is to rear Monarchs that eventually evolve to never migrate anymore. So, make sure to raise your caterpillars outside in a Butterfly Rearing Cage (we have rentals available for anyone who would like to try this out once, or can't afford purchasing supplis online and would like them for a cheaper price). More details are explained in our course, along with a video my Mr. Lund Science that explains an outdoor rearing set up for you to be able to watch your Monarchs grow, while making sure that the Monarchs can also get the cues they need to help them migrate.
Before raising your Monarchs, make sure to disinfect all of your supplies and containers to prevent disease.
How to Find Monarch Eggs in the Wild
YouTuber and Science teacher, Rich Lund, who has been an incredible resource and help while Marielle raises her monarchs. We have all the mentioned Monarch videos you need listed below, including how to identify Monarch eggs. Here's a quick overview:
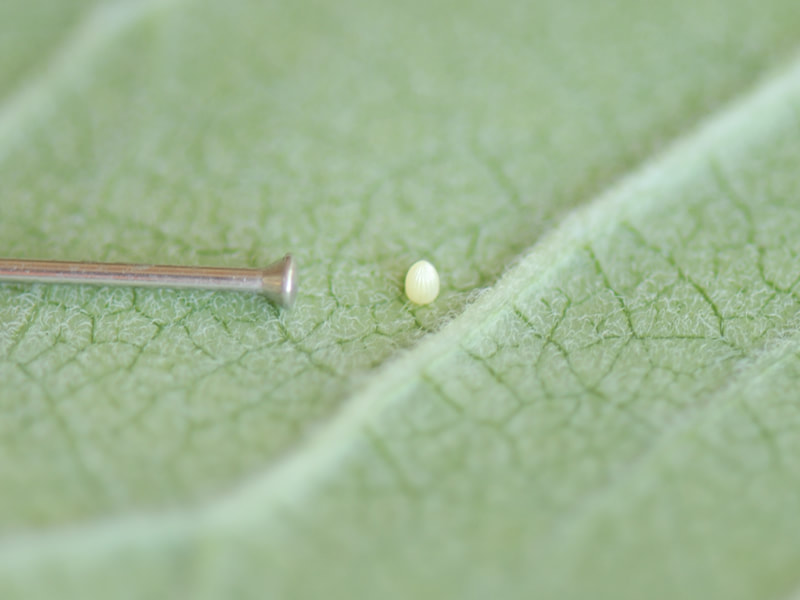
What to Look for in an Egg
|
|
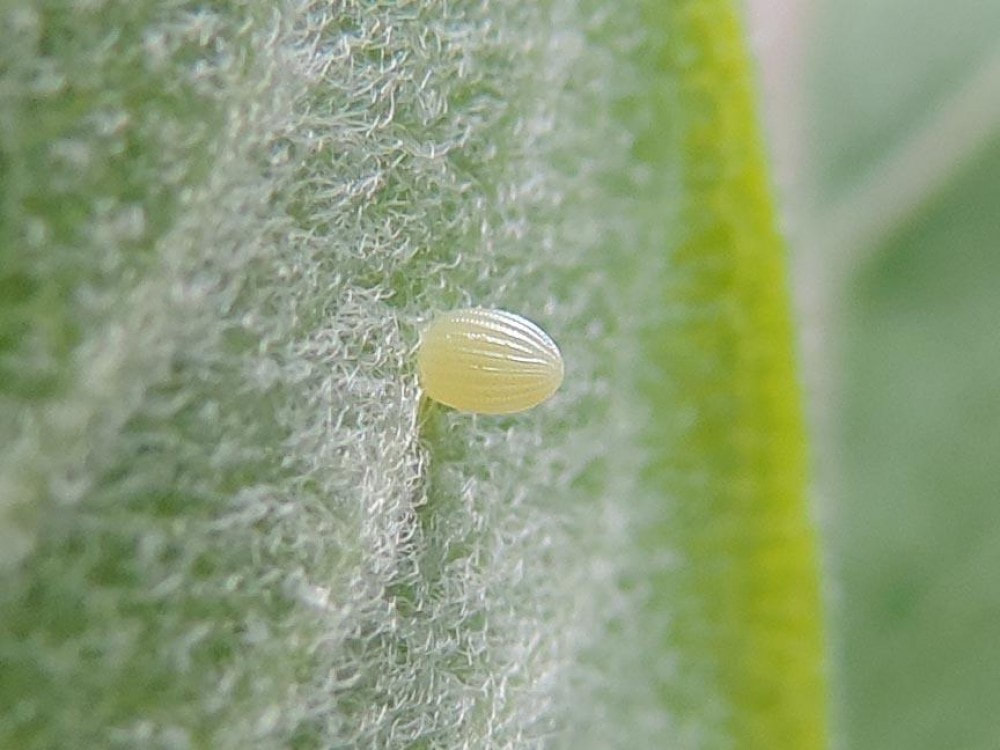
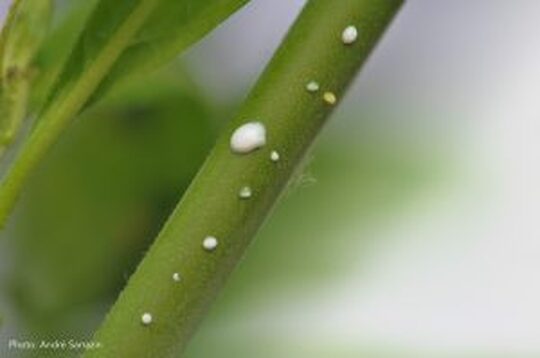
When finding Monarch eggs, it's very easy to confuse an egg with a milkweed sap bead. Sometimes, other occupying insects will eat or bite at the milkweed and little beads of the white milkweed sap will form from the leaf. A way to tell the difference is to simply use a magnifying glass or the magnifying option on your phone to look closely at the subject. Turn it to the sun and look closely. Here are some differences:
|
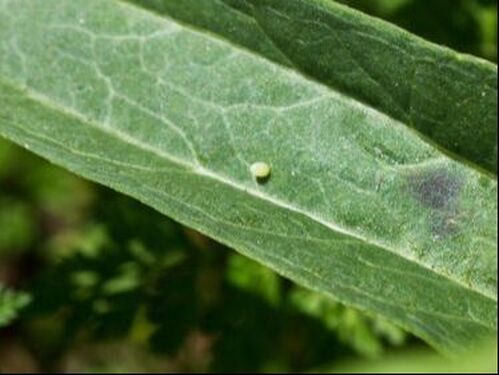
Monarch Egg Characteristics:
|
Milkweed Sap Bead Characteristics
|
Once you have found an egg, carefully snap the leaf off of the milkweed stalk. Put the leaf into your container and then search the rest of the plant for more eggs! A Monarch tends to lay only one egg per leaf so be sure to check every leaf.
Milkweed has a toxic sap that comes from it so make sure not to touch your face when collecting leaves. Wash your hands when you return home. This is the same substance that makes Monarchs poisonous!
Milkweed has a toxic sap that comes from it so make sure not to touch your face when collecting leaves. Wash your hands when you return home. This is the same substance that makes Monarchs poisonous!
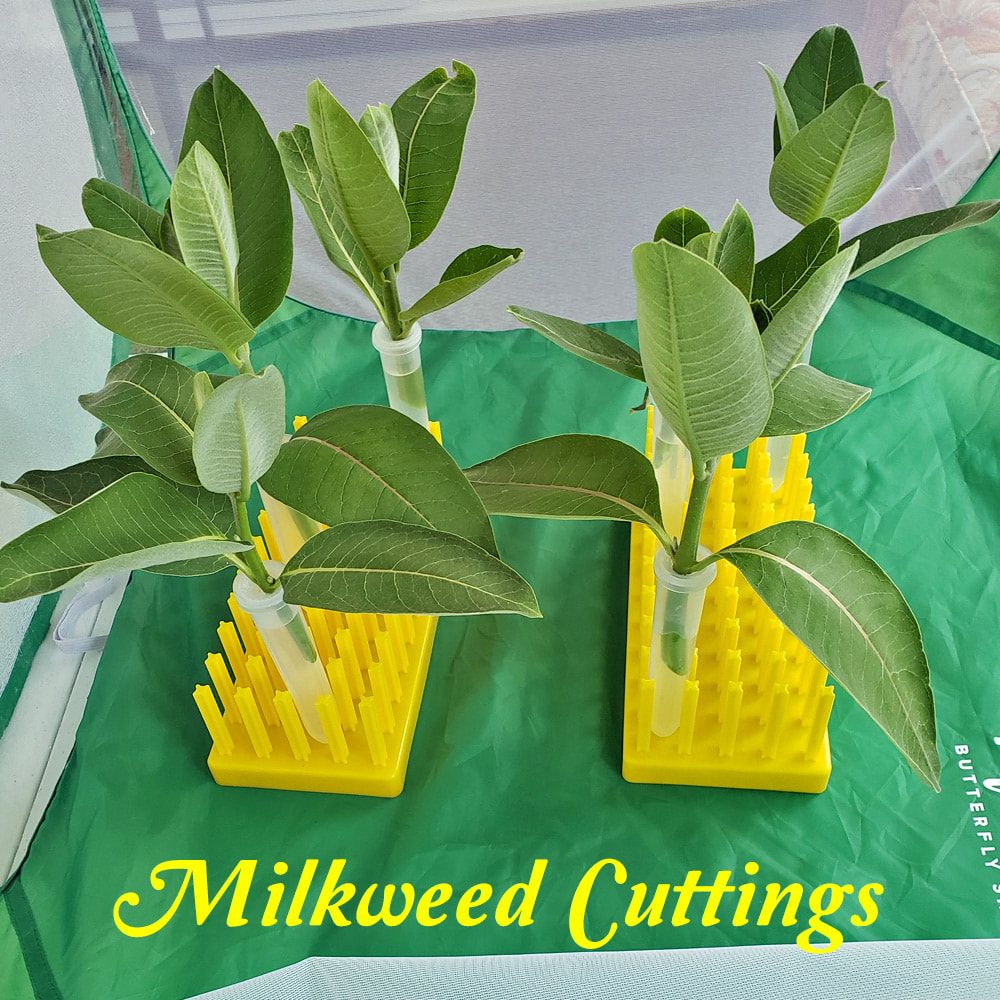
Make sure to get a stash of milkweed so that you won't have to go out every time you need to feed your caterpillars. You can collect stems, or leaves. Stems are too large for smaller caterpillars, so you can start off with leaves, then graduate to stems.
Some ideas to keep your milkweed fresh:
Preparing the Eggs
When you come home with your eggs, you will need to disinfect your caterpillar container with a bleach solution. You can use a 1 part beach to 7 part water solution and soak the cage in this bleach bath. Remember, we're trying to prevent infection. After you've disinfected, take the leaves with eggs on them and carefully cut out the eggs with some small scissors and tweezers. Cut out a small square around the egg and put it into your dish or lid. Mr. Lund goes into depth about this in Part 1 of his 5 part series of raising monarchs (listed below). By cutting out the eggs, you are making sure that the leaf will not dry and curl onto the egg and trap the hatched caterpillar. You can also easily see if the eggs have hatched or not, and track the hatchlings. Next, put the eggs in a small saucer and place them outside in you cage so they can hatch. You can put rocks or bricks around the saucer to protect it from wind blowing the eggs around.
Hatching and Feeding
After 3-5 days of waiting, you will start to notice that the eggs have a "black tip" this is the head of the caterpillar inside and this means that the egg will hatch in about 24 hours!
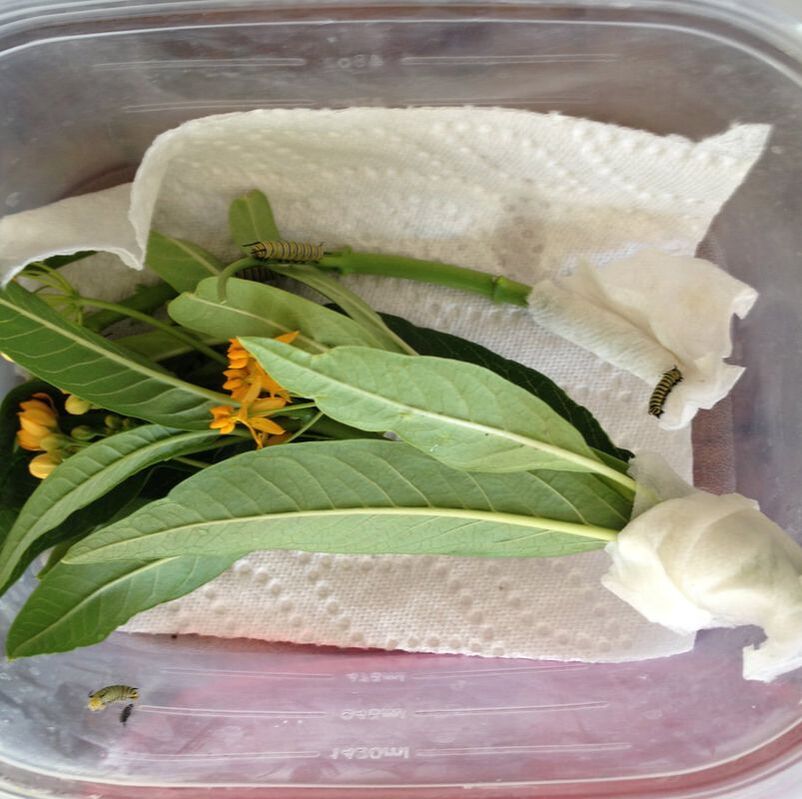
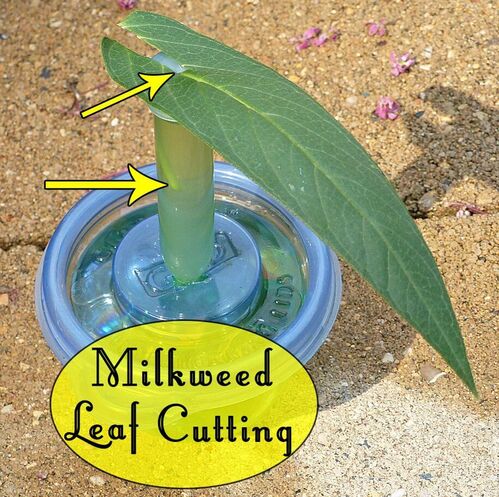
Now is your time to prepare your leaves. Prepare a leaf with a damp paper towel aroudn the stem, or to make the leaf stem longer, cut out some of the leaf from the stem and put this stem in a floral tube. You can put the floral tube in a cup. One the eggs have black tipped, put it on the leaf so that it has some fresh food to eat when it comes out. If a caterpillar has already hatched, carefully coax the little caterpillars onto the leaf. For the next few weeks, you will need to replace dry leaves with fresh ones about every 3 days, as said above, and keep feeding the caterpillars as they grow and grow. Once the caterpillars have grown bigger, you can graduate them to stems. Make sure to wrap the leaves in paper towels every time to keep them fresh as long as possible.
Now is your time to prepare your leaves. Prepare a leaf with a damp paper towel aroudn the stem, or to make the leaf stem longer, cut out some of the leaf from the stem and put this stem in a floral tube. You can put the floral tube in a cup. One the eggs have black tipped, put it on the leaf so that it has some fresh food to eat when it comes out. If a caterpillar has already hatched, carefully coax the little caterpillars onto the leaf. For the next few weeks, you will need to replace dry leaves with fresh ones about every 3 days, as said above, and keep feeding the caterpillars as they grow and grow. Once the caterpillars have grown bigger, you can graduate them to stems. Make sure to wrap the leaves in paper towels every time to keep them fresh as long as possible.
How to Clean Up After Caterpillars
About once a week, you will notice that the caterpillars poop what's called frass. It is necessary to clean the containers so that the caterpillars don't get sick. Simply gently take the caterpillar out, if it has walked away from the leaf (that's probably a big sign that you need to give them some fresh food) take a leaf and coax it onto the leaf. Put the caterpillars in a temporary container while you clean their cage. You'll have to either vacuum or shake out the poop, and every so often you may want to consider washing it. This is optional though.
Pupating and Eclosing
Pupating
After the fifth instar, the caterpillars will shed their skin one more time. This last time means that they are going to turn into chrysalides! Before they do so, you may find that your caterpillars will stop eating, and venture away from the food. They will start exploring and climbing to the top of the container, finding a spot to create a chrysalis. Once it has found it, it will start to spin a silk "hook", a little nub of silk so it can hang from.
Then when the caterpillar is ready, it'll attach the little cremaster inside its bum and "J hang", meaning it will literally let go and hang off of this silk "button", and hang in the form of a J. This means your Monarchs are going to pupate very soon, turning into a chrysalis. You know they are going to because their filaments (antennae) will start to shrivel up. Then the caterpillar will shed the skin and reveal the pupa or, green body, inside. It's very important not to bother the caterpillar during this time. Once it has shed all the skin it will then start to harden and turn into the chrysalis. It will stay here for about 2 weeks while the butterfly grows and forms inside, and then it will eclose, it will hatch out as a butterfly!
Then when the caterpillar is ready, it'll attach the little cremaster inside its bum and "J hang", meaning it will literally let go and hang off of this silk "button", and hang in the form of a J. This means your Monarchs are going to pupate very soon, turning into a chrysalis. You know they are going to because their filaments (antennae) will start to shrivel up. Then the caterpillar will shed the skin and reveal the pupa or, green body, inside. It's very important not to bother the caterpillar during this time. Once it has shed all the skin it will then start to harden and turn into the chrysalis. It will stay here for about 2 weeks while the butterfly grows and forms inside, and then it will eclose, it will hatch out as a butterfly!
Moving the Chrysalides
Sometimes caterpillars don't make the chrysalis in the best spots. So you'll have to move it. To move the chrysalis, lay out a towel underneath incase the chrysalis falls. Then, take a pair of tweezers and gently pull from the base of the stem of the chrysalis where i attaches to the silk, and pull. The silk is incredibly strong so you'll have to pull firmly. You can also tightly tie some floss around the stem, and use a pin to loosen the silk round the chrysalis to take it off. Once your chrysalis is off, you can wad up the silk and hang it up using a clip, tape, or stick the pin into the silk wad and pin it up, You can also use the floss and tie it tightly around the silk and hang it from there.
What if the chrysalis falls?
Did you know that the chrysalis doesn't have to hang for the butterfly to eclose! If in the event that the chrysalis falls, or the stem of the chrysalis breaks, you can take a container and put a pantyhose with the foot inside of the container. This creates a little nest for the chrysalis. When the butterfly ecloses, it will crawl out to the sides and hang there while the wings dry. Don't worry, Marielle, and Mr. Lund have gone through this same problem and it turned out fine!
Eclosing
After a couple weeks of quiet, the chrysalis will start to turn translucent and you will start to see the butterfly wings inside. This means that the chrysalis is going to eclose, or, hatch out of the chrysalis, within 24 hours. Now's the time to lay out some scrubbing sponges soaking in some honey water, ready for when the butterflies come out. When the butterfly ecloses, it will crawl out, wings shriveled and weak, while it starts to pump blood from its abdomen, then the wings will dry. This takes several hours, so don't bother the butterflies.
Feeding the Butterflies
The next 24-48 hours, the butterfly will not be hungry, but to give it a little boost of energy before you let it go. Once the butterfly has dried and it starts to flutter around, you can touch it. The butterfly will start to get a little antsy so this is usually a sign that their wings are dried and you can safely touch them. The butterfly tastes with it's feet so you may have to gently move it down to the scourer so it can taste the food. An alternative is watermelon, or a saturated fruit like so. It still might not eat, so what you can do, is hold the butterfly with its wings closed, on the sides of its body where the wings attach to the body and with all four wings folded back. This is the strongest part of the butterfly's wings (learn more about how to hold a butterfly in our tagging article). Take a toothpick and gently uncurl the proboscis into the honey water. It should start eating.
Releasing the Butterflies
It's best to release the butterflies in the morning or early afternoon, so that the butterflies have the whole day to find food, versus releasing them later and being hungry for a whole day. Make sure to tag the butterflies before you release them so that we can help scientists in Mexico learn about them and their migration! Also don't forget to post your butterflies to the iNaturalist Project to help scientists find out more about NM Monarchs and their migration!
